[3 Easy Steps] How To Start a Blog Using GreenGeeks?
Are you planning to start a blog? Well, blogging is one of the most popular ways of making money online.
But there are a lot of things that you should know before starting a blog which includes questions like,
- How to register a domain name?
- Which web hosting service is best?
- Best blogging platform to use
- How to install WordPress?
- How to install a WordPress plugin?
- How to set up Google Analytics on a WordPress website? and much more.
These are a few questions that every beginner has to face. But don’t worry, we have got you covered. Below are three important steps to consider –
- Selecting and registering a domain name.
- Purchasing a hosting plan from a reliable hosting provider.
- Install and set up WordPress, WordPress theme, and must-have WordPress plugins.
Let’s dive in and understand these steps in detail.
Table of Contents
1. Selecting and Registering a Domain Name
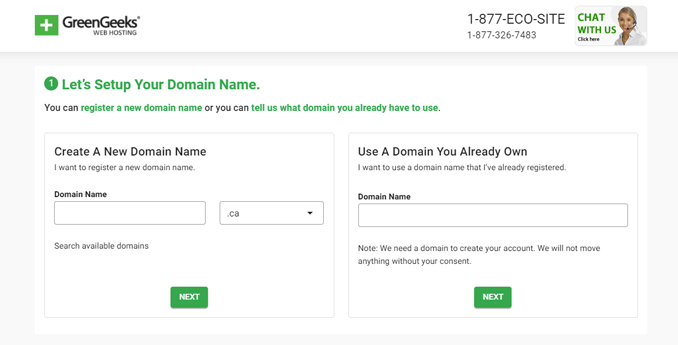
A domain name is the first stepping stone to starting a blog. It is the web address of your website through which people can find your blog posts.
But how to choose a perfect domain name and where should you register your domain name?
Here are few tips that will help you in choosing a perfect domain name which is –
- Easy to remember,
- Easy to spell,
- Short in length,
- Without filler words,
- High search volume,
- Relevant to your industry, and
- Relevant to the content and niches you are going to cover on your website.
Note: GreenGeeks offer a FREE domain name with all the hosting plans which means you can save around $28.95 by purchasing a hosting package from GreenGeeks.
Now, moving on the domain name registration, there are a lot of popular domain name registrars from where you can register your domain name without hassle.
Here are a few recommendations to ease your confusion –
2. Purchasing a Web Hosting Plan
Web hosting plays a crucial role in the success of a blog in the long-run. Therefore it’s super important to choose the right hosting service for your website.

Initially, bloggers opt for a cheaper hosting service which not only affects the performance and user experience but also the SEO rankings, which is one of the website speed ranking factors in Google’s search engine algorithm.
And it’s obvious because initially, bloggers have a tight budget. So what’s the solution? Should you opt for a cheaper hosting service and compromise with the performance or vice versa?
Well, that’s where GreenGeeks come in. GreenGeeks is one of the most popular hosting providers that offer both cheaper prices and optimized performance for WordPress websites.
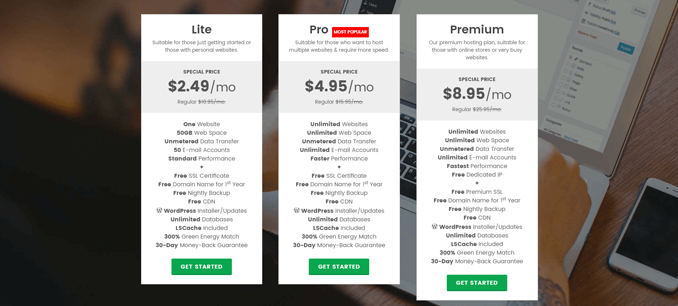
GreenGeeks introductory web hosting pricing plans start from $2.95/month and go as high as $8.95/month which also includes extra FREE perks like –
- Domain name, (Worth $28.95/year)
- SSL certificate, (Worth $50/year)
- CDN, and
- Nightly backups.
Other Recommendations
Here are a few other recommendations of web hosting providers –
3. WordPress Installation & Setup
Last step is to install WordPress, WordPress theme, and WordPress plugins.
Before moving on to the installation, let’s understand why you should choose WordPress as your blogging platform.
Why WordPress?
WordPress is amongst the most popular blogging platforms. It’s 100% FREE, SEO friendly, easy to use, powerful, and still evolving. More than 40% of the websites on the internet are now powered by WordPress and even used by enterprise businesses.
WordPress Installation
Talking about the installation, if you opt WordPress hosting from a reliable web hosting provider like GreenGeeks, then chances are you will get pre-installed WordPress and you can simply go ahead and install WordPress theme and plugins.
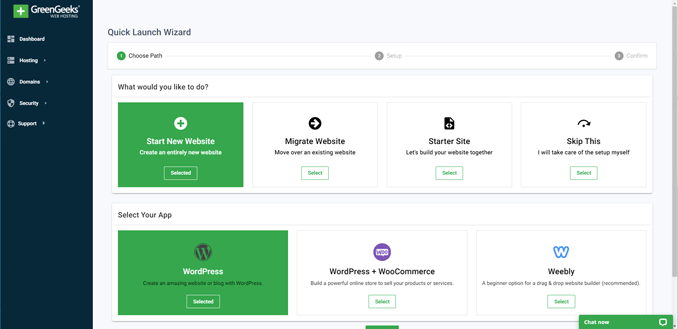
And for non-WordPress plans, you find an option of 1-click WordPress installation. Even a beginner can install WordPress without understanding or learning technical stuff with the help of a 1-click installer.
Installing WordPress Theme
Next, you need to install the WordPress theme. Thousands of free and premium WordPress themes are available to choose from which makes it very difficult to make a choice.
After all, your website’s look and performance highly depend on the WordPress theme.
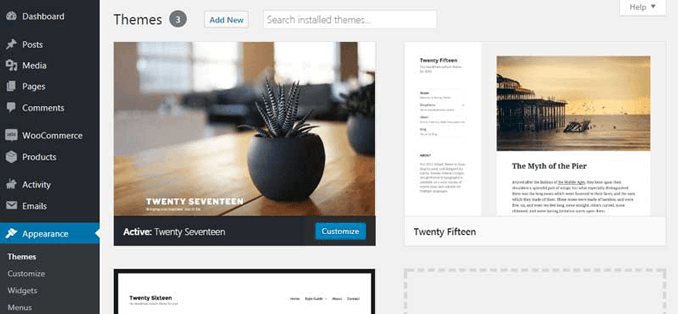
Therefore, to minimize your options, here are some of the most popular blog WordPress themes –
Installation of Essential WordPress Plugins
Beginners always get confused about which and how many WordPress plugins they should install on their WordPress website.
Well, first of all, no number is fixed. It completely depends on multiple factors and honestly, I believe that any number that fulfills the requirements is enough. If it’s possible to reduce the number of installed plugins, then it’s great.
Talking about which plugins you should install, refer to this article where we have compiled a list of must-have WordPress plugins to install on a WordPress website.
And if you are not aware of how to install plugins, you can check out our other guide on how to install a WordPress plugin.
[BONUS] Essential Settings After WordPress Installation
Many beginners and even experts don’t follow a few essential settings that every WordPress website owner should do after installing WordPress.
Here is the complete list of essential settings to do after WordPress installation that will help you in optimizing your WordPress website from the beginning.
Welcome To The Blogging Community!
So these are the simple steps to set up your blog. Once you are done with the setup, you can move on to more advanced steps including,
- Adding Google Analytics code to WordPress,
- Creating a contact form for your WordPress website,
- Optimizing your website for SEO,
- Configure WordPress security, and
- Much more.
If you face any difficulties during the setup process, we are just a message away.
