How to Set Up WP Mail SMTP Using Amazon SES?
Are you facing problems with WordPress emails? Or Not receiving email notifications in WordPress?
Well, these are some common problems that a WordPress user faces!
An easy solution to avoid this situation is to use an SMTP WordPress plugin to send and ensure inbox delivery of WordPress emails.
And the best email SMTP WordPress plugin that I am recommending in this post is the – WP Mail SMTP by WPForms.
Let’s understand how you can set up WP Mail SMTP Plugin using Amazon SES?
Table of Contents
Why Using a PHP Mail Function is a Bad Idea for WordPress Email Notifications?
WordPress uses the default PHP mail() function to send WordPress emails (notifications) generated by contact forms like WPForms, newsletter subscription forms, and security plugins like WP Cerber and Sucuri.
But the problem with the PHP mail function is that many WordPress hosting services disable the use of the PHP mail function on their servers due to security reasons.
And chances are your email might not even reach the spam folder of the recipient.
That’s where the SMTP WordPress plugin came in.
You can solve this issue by using the WP Mail SMTP WordPress plugin instead of using the default mail function.
You can read more about the plugin in my other article on WP Mail SMTP Review.
Also, apart from WP Mail SMTP, we’re going to use the Amazon SES SMTP service to send WordPress emails.
What is Amazon SES?
Amazon SES is a cost-effective SMTP solution that guarantees high inbox delivery and email deliverability.
It not only is more reliable than hosting servers but also provides some more tools for email marketing.
The only basic requirement to use Amazon SES on your WordPress website is that your website must have an SSL certificate installed.
How to Set up WP Mail SMTP Using Amazon SES?
The whole process of WP Mail SMTP setup with Amazon SES is divided into 2 parts –
- Amazon AWS Account Setup on Amazon.com.
- Amazon SES Mailer Setup in WP Mail SMTP Plugin.
1. Amazon SES Account Setup on Amazon.com.
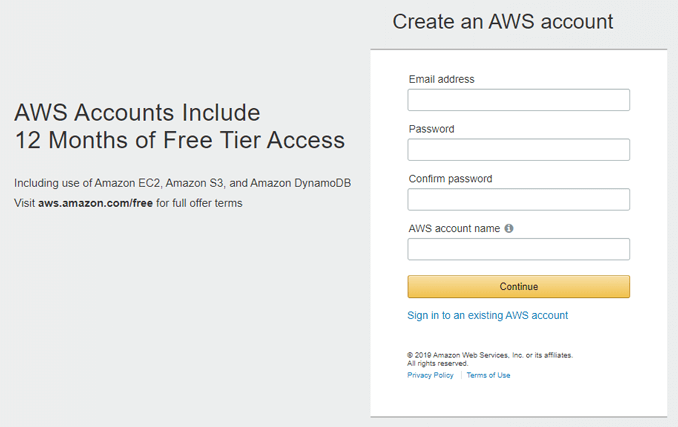
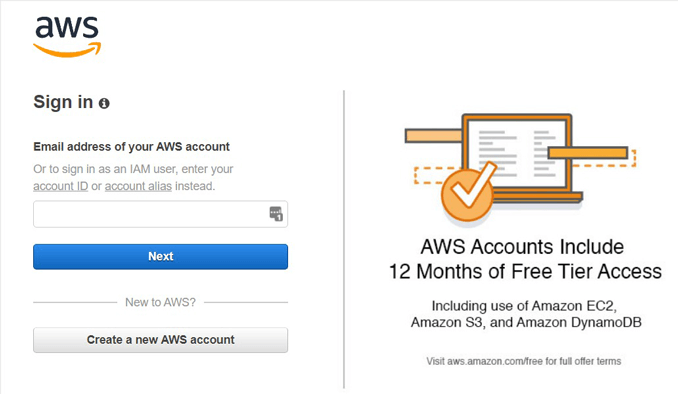
Step 1. Create an AWS account on Amazon.
If you already have an AWS account, then log in to your account.
If you don’t have an account, you need to signup for an AWS account here.
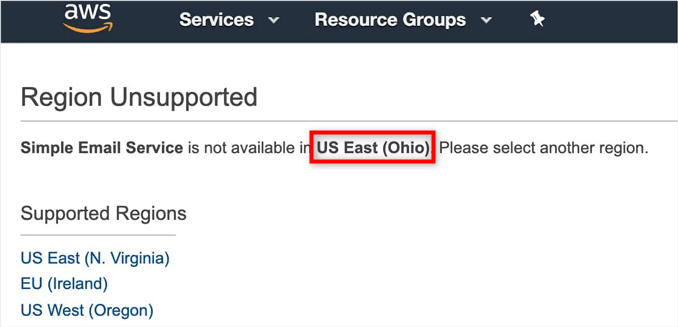
Step 2. Select Your Region
After registration, the first thing you need to set is your region.
Though AWS determines the region automatically via your IP Address, if you wish to change it, you can change it from here.
Step 3. Create an IAM User with User Details
Once all the settings are done on your Amazon Web Server account, the next step is to create an IAM user from the IAM Users page.
Sign in to your dashboard and click on the Add user button.
Add a unique user name in the username field. We will recommend you to follow the format – sitename_servicename.
So if I have to create an IAM user for my website then the username will be themaverickspirit_wpmailsmtp.
After username, check on the Programmatic Access from the access type.
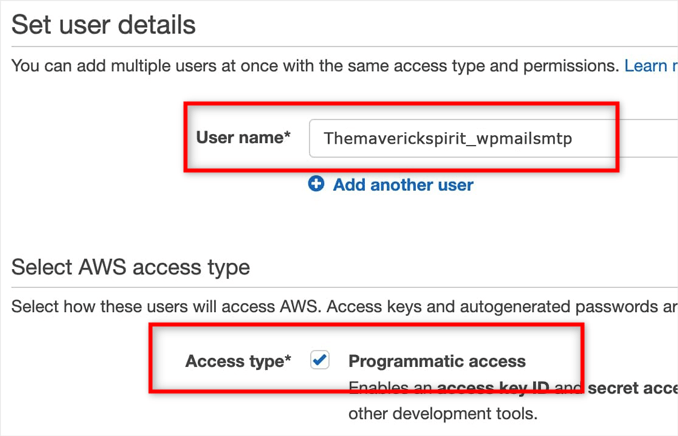
This setting will generate an access key ID and secret access key.
Once done, click on the Next: Permissions button.
Step 4. IAM User Setting Permissions
In this step, you need to select Attach existing policies directly from the top bar.
Then you need to search AmazonSESFullAccess in the search bar and check the returned result to add permission for the user.
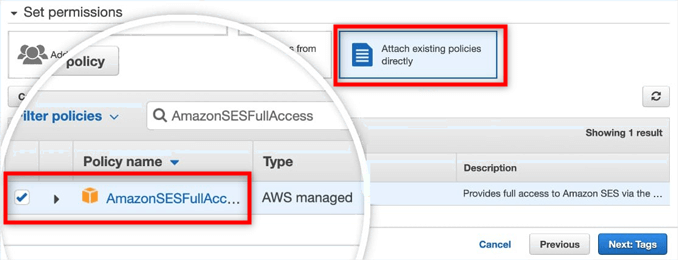
Once done, click on Next: tags and skip directly to the Next: Review page.
Step 5. Review User Details
On this page, you will be asked to review all the details you’ve chosen so far for the user.
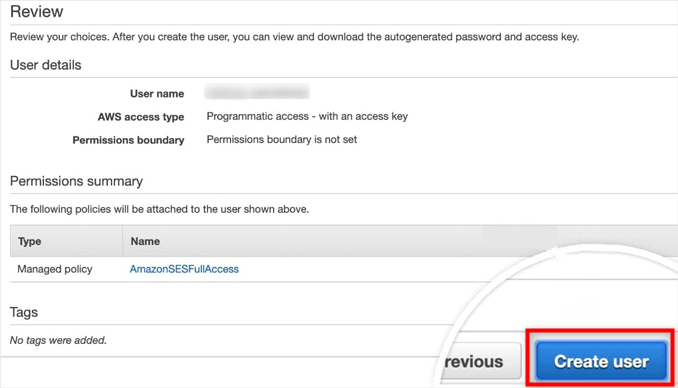
If everything looks alright, click on Create User.
On success, you will see a success message along with the Access Key ID and Secret Access Key.
Step 6. Switch to Production Mode
By default, Amazon SES Account is created on Sandbox Mode (Testing Mode).
You are not allowed to send emails in Sandbox mode. To enable the feature you need to switch to Production mode.
Follow the steps to switch from Sandbox mode to Production mode –
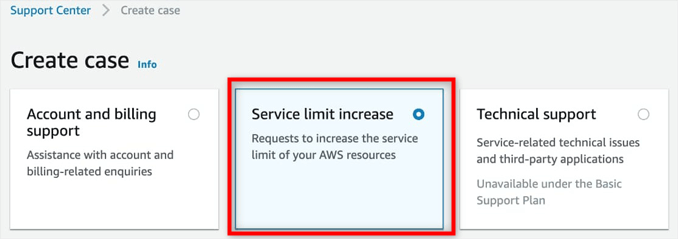
(a) Go to Create Case page and select Service limit increase.
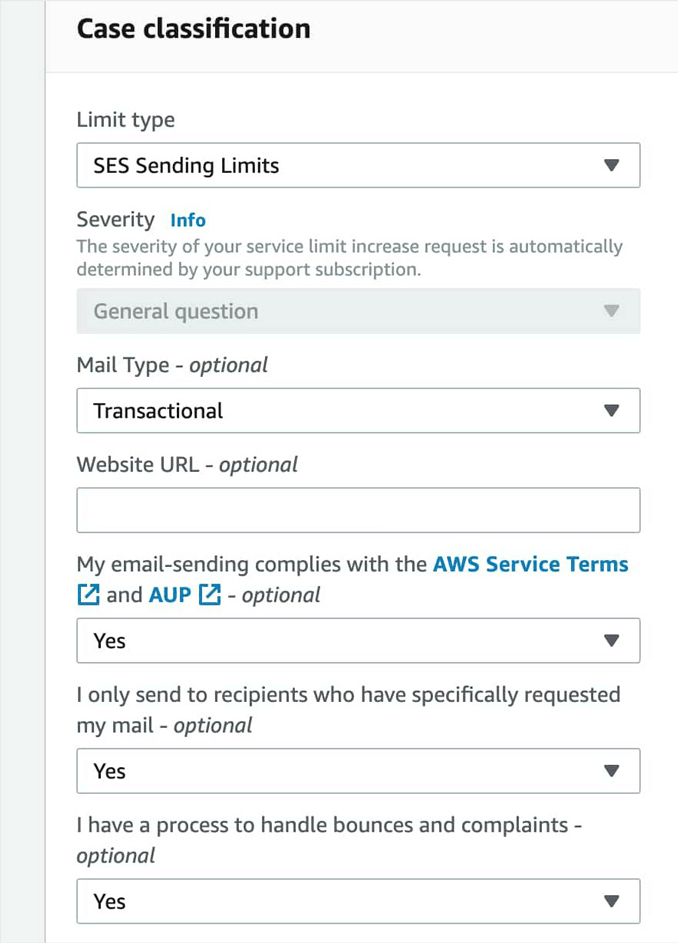
(b) Fill the case classification form. These form details are used to avoid spam and spammers.
(c) Lastly, fill in the use case description and Submit the details.
After all this process, Amazon will review your request and reply within 1 day.
Now that we are done with the settings on Amazon, let’s move on to the next part – Amazon SES Mailer Setup in WP Mail SMTP Plugin.
2. Amazon SES Mailer Setup in WP Mail SMTP Plugin.
Step 1. Install and Activate the WP Mail SMTP plugin.
We have explained the installation and step process on the other post – WP Mail SMTP Review.
Step 2. Configure Amazon SES in WP Mail SMTP plugin
(a) Go to Dashboard > WP Mail SMTP > Settings
(b) Fill out the From Email and From Name details.
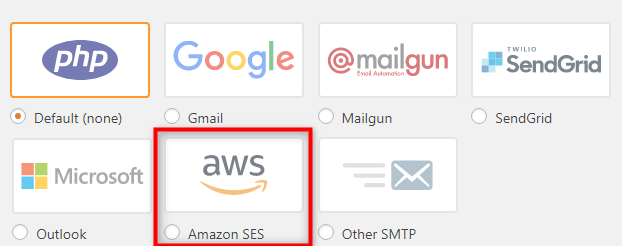
(c) Scroll down to the Mailer section and select Amazon SES.
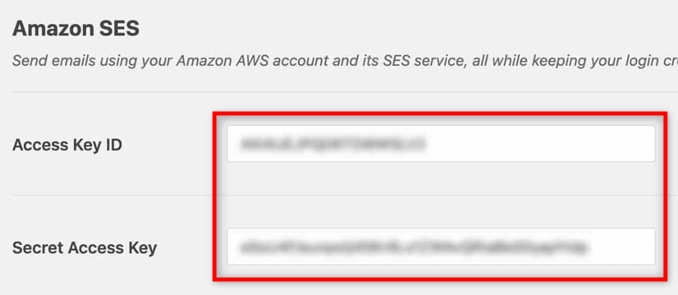
(d) Now that you have selected Amazon SES, next you need to fill out the details like Access Key ID and Secret Access Key.
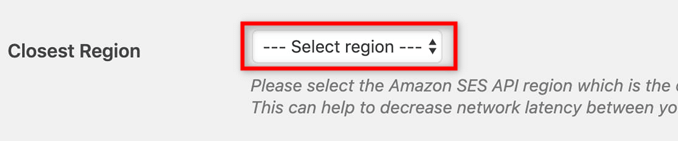
(e) Next, you need to select the region. This region must match the region you chose in the AWS account.
(f) Once you saved all these details, you will be asked to add Verified Emails.
(g) Click on Add an Email Address and send a verification email.
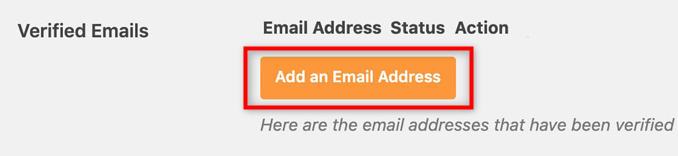
(h) Once verified, the email address will appear in WP Mail SMTP settings.
You can verify multiple email addresses via the same process.
Step 3. Send a Test Email
The last step is to send a test email to check if the configuration is correct.
(a) Go to Dashboard > WP Mail SMTP > Settings > Email Test.
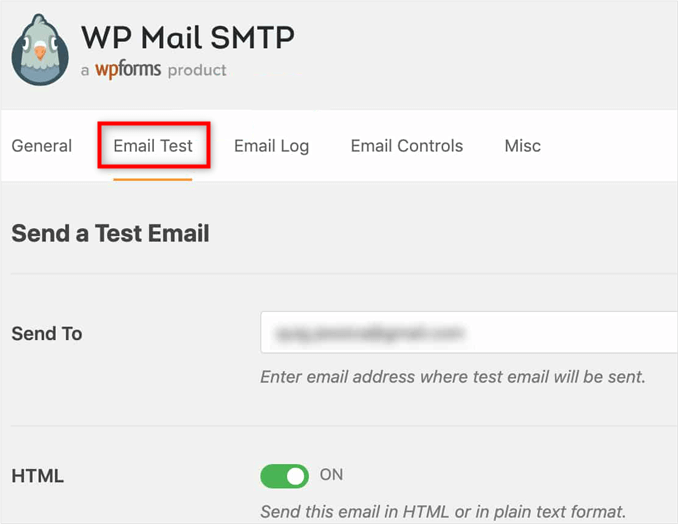
(b) Enter the email address to which you want to send the test email and send the email.
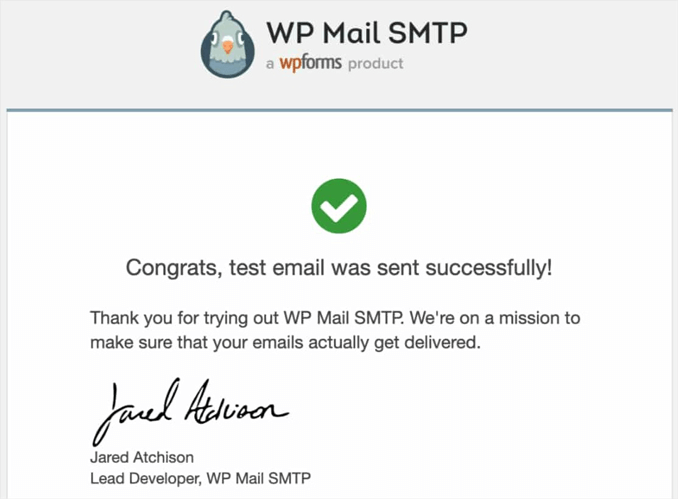
On success, you will see a success message on the dashboard.
Conclusion
I hope the above tutorial must have helped you in the WP Mail SMTP setup using Amazon SES.
WP Mail SMTP provides easy integration of Amazon SES with your WordPress website. While Amazon SES ensures email deliverability and inbox delivery.
So I will definitely recommend you to try both of them and let me know how it goes.
Also, you can ask me questions if you have any regarding the article. I would be happy to help you out.
Meanwhile, you can go through this detailed article on – WP Mail SMTP Review – Best Email Deliverability WordPress Plugin to Avoid Spam Filters!