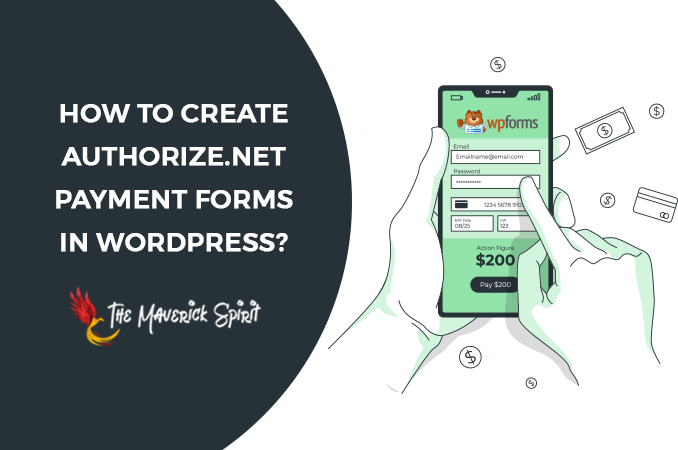
How To Create, Accept & Secure Payment Forms Online? [Authorize.Net + WPForms]
Do you want to accept subscription payments using Authorize.Net on your WordPress forms?
Authorize.Net is one of the most popular payment gateways that allows you to process and accept one time and recurring payments securely.
It accepts all the major credit cards, debit cards – American Express®, MasterCard®, Discover®, Visa®, JCB, Diner’s Club, etc.

To create payment forms in WordPress, we are going to use WPForms which is one of the best drag-and-drop form builder plugins for WordPress.
It allows you to create almost all types of forms including,
- file upload forms,
- forms with spam protection,
- multi-page forms,
- survey and poll forms,
- Payment forms that accept recurring payments, and many more.
It also offers integration with third-party tools like –
- Aweber,
- GetResponse,
- Sendinblue,
- Drip, and many more.
WPForms offers an Authorize.Net addon that lets you accept payments via contact forms. This payment addon comes only in WPForms Elite plan.
Table of Contents
Easy Steps To Enable Recurring Payments Using WPForms + Authorize.Net
Here are the steps to enable recurring subscription payments using WPForms and Authorize.Net.
1. Install & Activate WPForms Elite WordPress Plugin
First, you need to install the WPForms Elite plugin.
If you don’t know how to install a plugin, you can check out our guide on how to install a WordPress plugin.
2. Install and Activate Authorize.Net Addon
Go to Dashboard > WPForms > Addon > Authorize.Net.
Install and activate the Authorize.Net extension.
3. Sign in to Authorize.Net
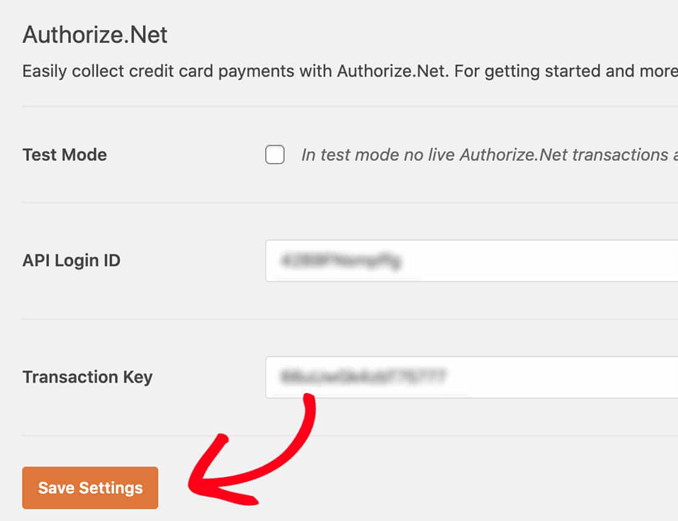
First, get API Key and transaction key from Authorize.net that you need to add to the WPForms payment settings.
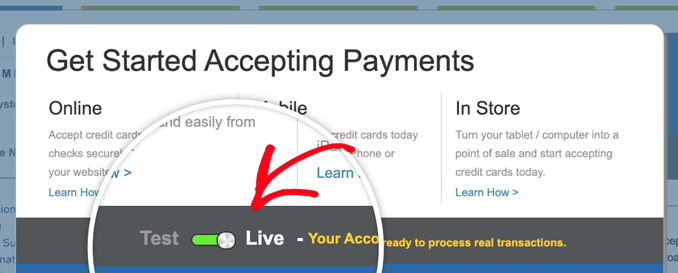
Sign in to your Authorize.Net account. The very first thing you will see after signing in is an option to set your Authorize.Net account on live or test mode. Make sure you set your Authorize.Net account to live.
3. Locate API Key & Transaction Key in Authorize.Net
To get the keys, you need to go to settings from the left sidebar of your account.

(a) API Key
Click on API Credentials and Keys in the settings page.

Next you need to copy API Login ID from the API Credentials and Keys page and paste it to a notepad.

(b) Transaction Key
Go to the Create New Key(s) section to create a transaction key.
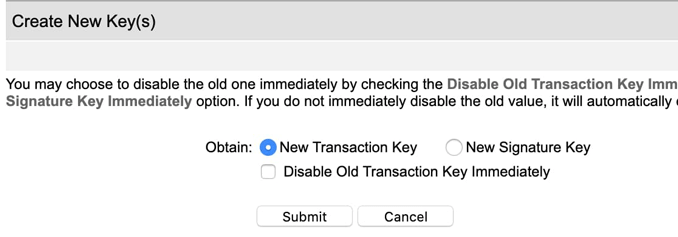
You need to select New Transaction Key in the Option settings and click on submit.
Now you will see an overlay right after submitting which will prompt you to complete the verification process. To initiate the verification process, click on the Request PIN button.
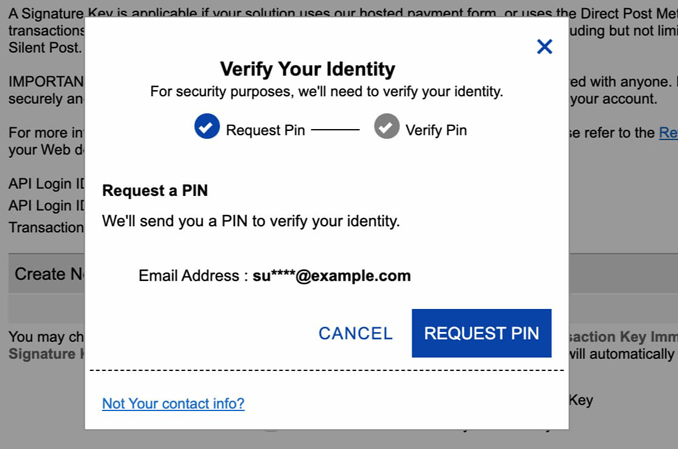
You will receive an email with the PIN. Copy and paste the PIN and click the Verify PIN button.
Once your identity is verified, you will see your Transaction ID. Copy this transaction ID to the notepad.

4. Enter Keys in WPForms Payment Settings
Next, you need to paste the copied API key and transaction key to the WPForms payment settings.
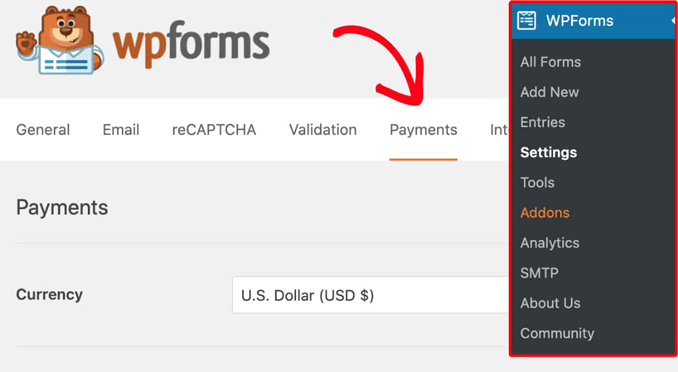
Go to Dashboard > WPForms > Payments. Scroll down to Authorize.Net and paste them in their respective fields.
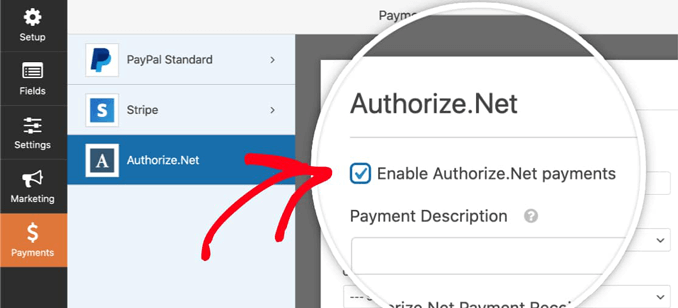
5. Add Authorize.Net to Forms
Next you need to add Authorize.Net to your new or existing contact form.
Also, there must be at least four fields in your form to work with Authorize.Net
- A Name field,
- An Email field,
- An items field (Multiple Items, Single Item, Dropdown Items, or Checkbox Items), and
- An Authorize.Net field (which collects credit card details)
Next, go to Payments > Authorize.Net and check the Enable Authorize.Net payments check box to enable Authorize.Net on the form.
You can also change the payment description, customer name, and payment email.
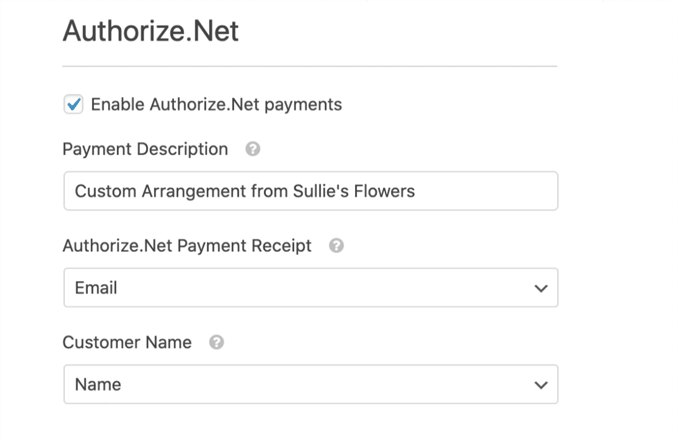
Once you enable Authorize.Net on a form, save the changes and you’re all set.
6. Set Up Recurring Subscription Payments
To enable recurring subscription payments, you need to check the Enable recurring subscription payments checkbox.

Once you enable the option, there are few optional fields that will appear –
- Plan name,
- Recurring period,
- Customer email, and
- Customer name.
Final Thoughts: Should You Use Authorize.Net Addon For WPForms?
Absolutely! Authorize.Net integration with WPForms makes it easier to accept subscription payments, both one-time and recurring payment subscriptions.
Also, Authorize.Net allows you to accept payments in multiple currencies and even allows you to send invoices to your customers after form submission.